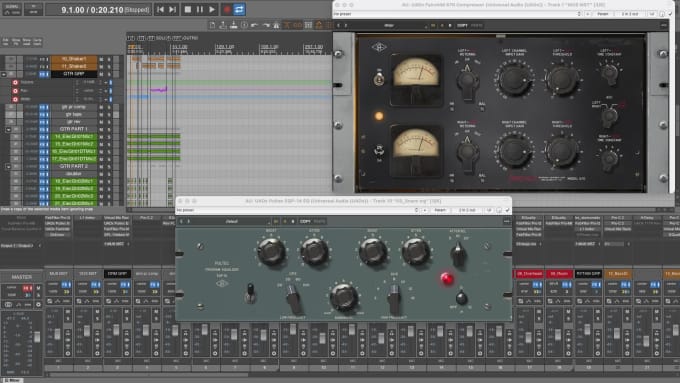
The Ultimate Handbook to Mastering Crystal-Clear Sound: Your Journey Through Audio Systems
Welcome to the definitive guide on achieving pristine, high-fidelity sound in any environment. Whether you’re a music enthusiast, a professional audio engineer, or simply someone who values exceptional audio quality, this handbook will equip you with the knowledge and tools to transform your listening experience. From understanding the fundamentals of sound waves to optimizing speaker placement and selecting the right equipment, we’ll cover every critical aspect of audio systems. Let’s embark on this journey together and unlock the secrets to crystal-clear sound.
Understanding the Basics: How Sound Works
Before diving into advanced audio systems, it’s essential to grasp the foundational principles of sound. Sound is a mechanical wave—a vibration that travels through a medium, typically air, and is perceived by our ears. These waves are characterized by their frequency (measured in Hertz, Hz) and amplitude (measured in decibels, dB). Frequency determines the pitch of the sound, with lower frequencies producing bass notes and higher frequencies creating treble sounds. Amplitude, on the other hand, dictates the loudness of the sound.
Sound waves interact with their environment in various ways. Reflection, absorption, and diffraction play significant roles in how we perceive audio in a given space. Reflection occurs when sound waves bounce off surfaces like walls or ceilings, often leading to echoes or reverberations. Absorption happens when materials like carpets, curtains, or acoustic panels soak up sound energy, reducing unwanted reflections. Diffraction is the bending of sound waves around obstacles, which can affect the distribution of audio in a room. Understanding these interactions is key to designing an optimal listening environment.
Choosing the Right Audio Equipment
Selecting the right audio equipment is a critical step in achieving crystal-clear sound. Your choices will depend on your specific needs, budget, and the environment in which the system will be used. Below are the essential components to consider:
- Speakers: The heart of any audio system, speakers come in various types, including bookshelf, floor-standing, in-wall, and portable models. Bookshelf speakers are versatile and suitable for small to medium rooms, while floor-standing speakers offer deeper bass and higher volume capabilities. In-wall speakers are ideal for custom installations where space is a concern, and portable speakers provide flexibility for on-the-go listening.
- Amplifiers: An amplifier’s primary function is to boost the signal from your source (e.g., CD player, turntable, or streaming device) to a level that can drive your speakers. There are different types of amplifiers, including integrated amplifiers (which combine a preamplifier and power amplifier in one unit), power amplifiers (which provide additional power to drive speakers), and receivers (which include an amplifier, tuner, and inputs for multiple sources).
- Source Components: These include devices that provide the audio signal, such as CD players, turntables, digital-to-analog converters (DACs), and streaming devices. High-quality source components ensure that the audio signal is clean and free from distortion before it reaches your amplifier and speakers.
- Cables and Interconnects: While often overlooked, cables play a crucial role in maintaining signal integrity. High-quality cables with proper shielding can reduce interference and ensure that the audio signal is transmitted without degradation. Consider using balanced cables for long runs or in environments with high electromagnetic interference.
- Room Acoustics and Treatment: No matter how high-end your equipment is, room acoustics can make or break your listening experience. Investing in acoustic treatment such as bass traps, diffusers, and absorbers can significantly improve sound clarity by controlling reflections and standing waves. Even simple adjustments like adding rugs, curtains, or bookshelves can help tame unwanted echoes and improve overall sound quality.
Optimizing Speaker Placement for Maximum Clarity
Even the best speakers can sound mediocre if they’re not placed correctly. Speaker placement is one of the most overlooked yet impactful factors in achieving crystal-clear sound. Proper placement ensures that sound waves reach your ears in a balanced and coherent manner, enhancing both imaging (the ability to pinpoint the location of instruments or vocals) and soundstage (the perceived spatial width and depth of the audio).
Here are some guidelines to optimize speaker placement:
- Listening Triangle: Position your speakers and listening position to form an equilateral triangle. This setup ensures that sound from both speakers reaches your ears simultaneously, creating a balanced stereo image. The distance between the speakers should be roughly equal to the distance from each speaker to your listening position.
- Toe-In: Angle your speakers slightly toward your listening position. A common practice is to toe-in the speakers so that they point toward the center of your head when seated. This adjustment helps improve focus and imaging, making the sound appear more precise and detailed.
- Distance from Walls: Avoid placing speakers directly against walls, as this can lead to exaggerated bass response due to boundary reinforcement. Instead, position them a few inches away from the wall to allow for better bass control. If you’re dealing with limited space, consider using speakers designed for near-wall placement or investing in room correction software.
- Height and Elevation: Speakers should be placed at ear level when seated. Floor-standing speakers can be placed on sturdy stands to achieve the correct height, while bookshelf speakers can be mounted on brackets or placed on dedicated shelves. Elevating speakers can also help reduce unwanted reflections from floors and ceilings.
- Symmetry: Ensure symmetry in your setup. Both speakers should be placed at the same distance from side walls and at the same height. Asymmetry can lead to imbalanced sound and poor imaging.
Calibrating Your Audio System for Perfect Balance
Once your equipment is set up and speakers are optimally placed, the next step is calibration. Calibration ensures that all components are working together harmoniously, delivering a balanced and accurate sound. This process involves adjusting settings on your amplifier, room correction software, and even your listening position. Here’s how to approach it:
- Level Matching: Ensure that both channels (left and right) are at the same volume level. Use a sound level meter or a smartphone app to measure the output from each speaker and adjust accordingly. Level matching is crucial for accurate stereo imaging.
- Crossover Adjustments: If your system includes a subwoofer, set the crossover frequency to blend seamlessly with your main speakers. A typical crossover setting for a subwoofer is between 80Hz and 120Hz, but this can vary depending on your speakers’ capabilities. The goal is to ensure a smooth transition between the main speakers and the subwoofer without any gaps or overlaps in frequency response.
- Room Correction Software: Modern receivers and processors often come with room correction software, such as Audyssey, Dirac Live, or RoomPerfect. These tools analyze your room’s acoustics and apply EQ adjustments to compensate for problematic frequencies, standing waves, and reflections. Run the calibration process as directed, and take note of any adjustments made to your system.
- Phase Alignment: Ensure that the phase of your speakers and subwoofer is aligned. Incorrect phase alignment can result in cancellations or reinforcements of certain frequencies, leading to a muddy or unnatural sound. Most room correction systems handle phase alignment automatically, but it’s worth double-checking in manual setups.
- Listening Position: Your listening position also plays a role in calibration. Sit in your primary listening spot and listen for any imbalances in frequency response, imaging, or dynamics. Make subtle adjustments to speaker placement or EQ settings to achieve the best possible sound.
Advanced Techniques for Audiophiles
For those who demand the absolute best in audio quality, advanced techniques can further refine your system’s performance. These methods often require additional investment and expertise but can yield significant improvements in clarity, detail, and overall fidelity.
- Bi-Amping or Bi-Wiring: Bi-amping involves using separate amplifiers for the high and low-frequency drivers in your speakers, while bi-wiring uses separate cables for the same drivers. Both techniques can reduce interference between drivers and improve dynamic range. However, they require compatible speakers and additional amplifiers or cables.
- Power Conditioning: Power conditioners filter out electrical noise and provide clean power to your audio components. They can reduce hum, buzz, and other interference that may degrade sound quality. High-end power conditioners often include features like voltage regulation and surge protection.
- Isolation and Vibration Control: Vibrations from speakers, amplifiers, or even the floor can introduce distortion into your audio system. Using isolation pads, spikes, or dedicated racks can minimize these vibrations and improve sound clarity. Isolation platforms specifically designed for turntables can also enhance vinyl playback by reducing surface noise.
- Cable Upgrades: Upgrading cables can have a noticeable impact on sound quality, particularly in high-end systems. Look for cables with low capacitance and resistance, proper shielding, and high-quality connectors. Experimenting with different cable brands and materials (e.g., silver vs. copper) can help you find the best match for your system.
- Digital Signal Processing (DSP): DSP allows for precise control over your audio system’s performance. Advanced processors can apply custom EQ curves, time alignment, and crossover adjustments to optimize sound for your specific room and preferences. Some high-end receivers and standalone processors include built-in DSP features.
Maintaining Your Audio System for Longevity
An audio system is an investment, and proper maintenance ensures that it continues to perform at its best for years to come. Regular upkeep not only extends the lifespan of your equipment but also preserves sound quality. Here are some essential maintenance tips:
- Cleaning: Dust and dirt can accumulate on speakers, cables, and connectors over time, leading to degraded performance. Use a soft, dry cloth to clean speaker cones, grilles, and cabinets. For stubborn dirt, slightly dampen the cloth with water or a mild cleaning solution, but avoid excessive moisture. Clean connectors and cables with contact cleaner to ensure optimal signal transmission.
- Ventilation: Ensure that your audio components have adequate ventilation to prevent overheating. Avoid placing amplifiers or receivers in enclosed cabinets, and keep them away from heat sources. Dust buildup on ventilation grilles can also restrict airflow, so clean these areas regularly.
- Firmware Updates: For digital components like DACs, streamers, and receivers, keep the firmware up to date. Manufacturers often release updates that improve performance, fix bugs, and add new features. Check the manufacturer’s website or use their dedicated software to check for and install updates.
- Speaker Care: Handle speakers with care to avoid damaging the drivers or cabinets. Avoid placing heavy objects on top of speakers, and be mindful of accidental bumps or drops. If you’re moving speakers, use proper lifting techniques to avoid straining the drivers or cabinet joints.
- Regular Listening Tests: Periodically listen to your system and compare it to reference tracks you’re familiar with. This practice helps you detect any changes in sound quality, such as degradation in clarity, bass response, or imaging. If you notice any issues, investigate the cause and address it promptly.
Troubleshooting Common Audio Issues
Even the most well-designed audio systems can encounter issues from time to time. Identifying and resolving these problems quickly ensures that you can enjoy uninterrupted, high-quality sound. Below are some common audio issues and their potential solutions:
- Muffled or Boomy Bass:
- Check speaker placement—avoid placing speakers too close to walls or corners, as this can exaggerate bass response.
- Adjust the crossover settings on your subwoofer or receiver to blend seamlessly with your main speakers.
- Use room correction software to identify and address problematic bass frequencies.
- Consider adding bass traps or absorptive panels in corners where bass buildup is most pronounced.
- Harsh or Sibilant Highs:
- Reduce the treble settings on your amplifier or processor, or apply a gentle high-frequency cut using an EQ.
- Check your speaker placement—excessive toe-in or proximity to reflective surfaces can emphasize harsh high frequencies.
- Invest in acoustic treatment, such as diffusers or absorbers, to tame reflections in the high-frequency range.
- Experiment with different speaker cables, as some may introduce unwanted harshness or glare.
- Imbalanced Stereo Imaging:
- Ensure that both speakers are placed symmetrically and at the same distance from side walls.
- Check for differences in cable length or quality between the left and right channels.
- Run a level-matching test using a sound level meter or smartphone app to ensure both channels are at the same volume.
- Adjust the balance control on your amplifier or processor to correct any imbalances.
- Distortion or Clipping:
- Reduce the volume or gain settings on your amplifier to prevent clipping, which occurs when the signal exceeds the amplifier’s capacity.
- Check your source components—distortion can originate from a poorly mastered recording or a damaged CD/DVD.
- Inspect cables and connectors for damage or loose connections that may introduce noise or distortion.
- If using a subwoofer, adjust the crossover frequency to ensure a smooth transition between the main speakers and the subwoofer.
- Hum or Buzzing Noises:
- Check for ground loops, which occur when multiple components are connected to different electrical grounds. Use a ground loop isolator or re-route cables to eliminate the issue.
- Inspect power cables and outlets—dirty power or faulty wiring can introduce hum or buzzing.
- Keep audio cables away from power cables and other sources of electromagnetic interference.
- Use a power conditioner to filter out electrical noise and provide clean power to your components.
Building Your Dream Audio System: A Step-by-Step Guide
Now that you’re equipped with the knowledge to optimize and maintain your audio system, it’s time to build your dream setup. Whether you’re starting from scratch or upgrading an existing system, this step-by-step guide will help you make informed decisions and create a listening experience tailored to your preferences.
Step 1: Define Your Goals and Budget
Before purchasing any equipment, clarify your goals. Are you looking to create a high-end audiophile system, a home theater setup, or a versatile multi-room audio solution? Your goals will influence the type of components you choose and the budget required. Set a realistic budget that includes not only the equipment but also accessories like cables, stands, and acoustic treatment.
Step 2: Research and Compare Components
Once your goals and budget are clear, research the components that best fit your needs. Read reviews, watch comparison videos, and consult forums or expert recommendations. Pay attention to specifications like frequency response, power handling, and sensitivity when selecting speakers. For amplifiers, consider factors like power output, distortion levels, and connectivity options. Don’t forget to check compatibility between components, such as impedance matching between speakers and amplifiers.
Step 3: Prioritize Room Acoustics
Before finalizing your speaker choices, assess your room’s acoustics. Measure the dimensions of the room and identify problem areas like corners where bass buildup may occur. Plan for acoustic treatment, such as bass traps, diffusers, and absorbers, to address these issues. If you’re working with a limited budget, prioritize treatments that address the most significant problems first, such as bass traps in corners or absorptive panels behind speakers.
Step 4: Select Your Core Components
With your research complete and room acoustics addressed, it’s time to select your core components. Start with the speakers, as they are the foundation of your system. Choose a model that fits your room size, listening preferences, and budget. Next, select an amplifier or receiver that can adequately drive your speakers and accommodate your source components. Ensure that the amplifier has enough power output for your speakers’ needs and includes the necessary inputs and features.
For source components, consider a DAC if you’re using digital files, a turntable if you’re into vinyl, or a CD player if you prefer physical media. Streaming devices and network players are excellent for accessing high-resolution audio and online music services. If you’re building a home theater system, invest in a surround sound receiver with the latest audio decoding formats like Dolby Atmos or DTS:X.
Step 5: Choose Accessories and Cables
While accessories like cables and stands may seem secondary, they play a crucial role in system performance. Invest in high-quality speaker cables that match the length and gauge required for your setup. For digital connections, use high-speed HDMI or optical cables to ensure lossless signal transmission. Speaker stands should be sturdy and properly sized for your speakers to minimize vibrations and improve stability. Consider using isolation pads or spikes to further enhance performance.
Step 6: Set Up and Calibrate Your System
With all components in place, it’s time to set up and calibrate your system. Follow the speaker placement guidelines discussed earlier to optimize imaging and soundstage. Connect all components using the appropriate cables and ensure that everything is powered on and functioning correctly. Run the room correction software included with your receiver or processor to fine-tune the sound for your room. Make any necessary adjustments to EQ, crossover, and phase settings to achieve a balanced and accurate sound.
Step 7: Fine-Tune and Enjoy
After the initial setup, take time to fine-tune your system. Listen to a variety of music genres and reference tracks to evaluate different aspects of sound quality, such as bass response, midrange clarity, and high-frequency detail. Make subtle adjustments to speaker placement, EQ settings, or room treatment as needed. Once you’re satisfied with the results, sit back, relax, and enjoy your newly crafted audio system.
Future-Proofing Your Audio System
Technology is constantly evolving, and your audio system should be ready to adapt to future advancements. Future-proofing ensures that your investment remains relevant and continues to deliver high-quality sound as new formats and technologies emerge. Here are some strategies to future-proof your system:
- Invest in Upgradable Components: Choose components that offer upgrade paths, such as modular receivers, processors with expandable inputs, or speakers with replaceable drivers. This flexibility allows you to upgrade specific parts of your system without replacing everything.
- Embrace High-Resolution Audio: High-resolution audio formats like FLAC, DSD, and MQA offer superior sound quality compared to standard MP3s. Invest in a DAC and network player that support these formats to ensure compatibility with future audio sources.
- Plan for New Formats and Technologies: Stay informed about emerging audio technologies, such as immersive audio formats (e.g., Dolby Atmos, DTS:X) and wireless audio solutions. Choose components that support these technologies, such as AV receivers with HDMI 2.1 or wireless speakers with multi-room capabilities.
- Expand Your System Gradually: Instead of overhauling your entire system at once, consider upgrading components one at a time. This approach allows you to assess the impact of each upgrade and ensures that your budget is allocated efficiently.
- Keep Up with Firmware Updates: Regularly update the firmware of your digital components to ensure compatibility with new features and improvements. Manufacturers often release updates that enhance performance, add new functionalities, or address compatibility issues.
Final Thoughts: The Path to Audio Perfection
Achieving crystal-clear sound is a journey that combines technical knowledge, careful planning, and a passion for audio. By understanding the fundamentals of sound, selecting the right equipment, optimizing speaker placement, and calibrating your system, you can create an audio experience that rivals professional setups. Remember that every component and adjustment plays a role in shaping the final sound, so take your time and enjoy the process.
Whether you’re a seasoned audiophile or a newcomer to the world of high-fidelity audio, this handbook serves as your roadmap to mastering sound. Experiment, listen critically, and don’t be afraid to make adjustments along the way. With dedication and the right tools, you’ll unlock the full potential of your audio system and enjoy music and audio content in a way you never thought possible.
Thank you for joining us on this journey through audio systems. Now, it’s time to turn up the volume, sit back, and immerse yourself in the world of crystal-clear sound.