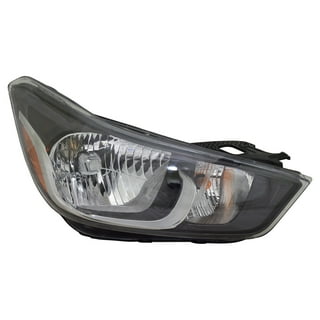
Reviving Your Ride: A Step-by-Step Headlight Restoration Guide
Headlights are more than just a stylistic feature of your vehicle—they’re your primary tool for safe nighttime driving. Over time, oxidation, dirt, and UV damage can turn clear headlights into yellowed, cloudy, and dim versions of their former selves. This not only reduces visibility but also detracts from your car’s overall appearance. Fortunately, restoring your headlights is a straightforward process that doesn’t require professional skills or expensive tools. In this guide, we’ll walk you through a step-by-step headlight restoration process to bring back their clarity and shine.
Why Restore Your Headlights?
Before diving into the restoration process, it’s important to understand why restoring your headlights is worth the effort. Here are a few key benefits:
- Improved Visibility: Clear headlights significantly enhance your ability to see the road ahead at night, reducing the risk of accidents.
- Enhanced Safety: Dim or yellowed headlights can make it difficult for other drivers to spot your vehicle, increasing the chances of collisions.
- Cost-Effective: Professional headlight restoration services can be expensive, while DIY methods cost a fraction of the price and provide similar results.
- Aesthetic Appeal: Restored headlights give your vehicle a polished, well-maintained look, boosting its resale value and curb appeal.
Tools and Materials You’ll Need
Gathering the right tools and materials before you start will ensure a smooth and efficient restoration process. Here’s what you’ll need:
- Headlight Restoration Kit: Available at auto parts stores or online, these kits typically include sandpaper, polishing compound, and a protective sealant.
- Microfiber Cloths: Essential for cleaning and buffing without scratching the headlight surface.
- Masking Tape: To protect the surrounding paint and prevent damage.
- Spray Bottle with Water: For wetting the sandpaper during the sanding process.
- Soap and Water: For initial cleaning of the headlights.
- Isopropyl Alcohol or Glass Cleaner: To remove any residual oils or contaminants.
- UV-Protective Sealant: Helps extend the life of your restoration by preventing future oxidation.
Step 1: Prepare the Headlights
Before you begin sanding or polishing, it’s crucial to clean the headlights thoroughly. This ensures that the restoration process is effective and that no debris interferes with the results.
- Wash the Headlights: Use soap and water to remove dirt, grime, and bug splatter. Rinse thoroughly and dry with a clean microfiber cloth.
- Mask the Surrounding Area: Apply masking tape around the headlight to protect the car’s paint from accidental scratches or damage during the restoration process.
- Apply Isopropyl Alcohol: Dampen a microfiber cloth with isopropyl alcohol or glass cleaner and wipe down the headlight to remove any remaining oils or residues.
Step 2: Wet Sanding the Headlights
Wet sanding is a critical step in removing the yellowed, oxidized layer from the headlight lens. This process smooths out imperfections and prepares the surface for polishing.
- Choose the Right Grit Sandpaper: Start with 800-grit sandpaper for heavily clouded lenses or 1000-grit for moderate oxidation. For lighter damage, 1500-grit or 2000-grit may suffice.
- Wet the Sandpaper: Keep the sandpaper wet by spraying it with water or dipping it in a spray bottle. This prevents scratches and reduces friction.
- Sand in a Circular Motion: Gently sand the headlight in overlapping circular motions, applying even pressure. Focus on the cloudy areas but avoid pressing too hard to prevent damaging the lens.
- Rinse and Inspect: After sanding with one grit, rinse the headlight with water and inspect the progress. If the cloudiness persists, move to a finer grit sandpaper (e.g., from 800-grit to 1500-grit) and repeat the process.
Step 3: Polishing the Headlights
Once the headlight is smooth and free of oxidation, it’s time to restore its clarity through polishing. This step removes the fine scratches left by sanding and brings back the lens’s natural shine.
- Apply Polishing Compound: Use a high-quality automotive polishing compound and a clean microfiber cloth or polishing pad. Apply a small amount of compound to the headlight.
- Polish in Circular Motions: Work the compound into the headlight using firm, overlapping circular motions. Continue polishing until the surface becomes clear and glossy. This may take several minutes, depending on the level of cloudiness.
- Inspect the Results: Use a flashlight or shine a light across the headlight to check for any remaining dull spots. If necessary, repeat the polishing process with a finer polishing compound.
Step 4: Sealing the Headlights
The final step in the restoration process is applying a protective sealant to shield the headlights from future oxidation and UV damage. This step is often overlooked but is essential for prolonging the results of your hard work.
- Clean the Headlight Again: Before applying the sealant, wipe down the headlight with isopropyl alcohol or glass cleaner to remove any remaining polishing compound or oils.
- Apply the Sealant: Use a UV-protective sealant included in your restoration kit or purchase a separate product. Apply a thin, even layer to the headlight lens using a clean microfiber cloth or applicator pad.
- Let It Cure: Allow the sealant to dry and cure according to the manufacturer’s instructions, usually for 24 hours. Avoid driving or exposing the headlights to water during this time.
Maintaining Restored Headlights
Restoring your headlights is only half the battle—they’ll need proper care to stay clear and bright for as long as possible. Here are some tips to maintain your newly restored headlights:
- Regular Cleaning: Wash your headlights with soap and water whenever they become dirty. Avoid using harsh chemicals or abrasive materials that can damage the sealant.
- Park in the Shade: Prolonged exposure to sunlight can accelerate oxidation. Whenever possible, park your car in a garage or under a shade.
- Apply a Fresh Coat of Sealant: Depending on your climate and driving conditions, reapply the UV-protective sealant every few months to maintain optimal clarity.
- Avoid Automatic Car Washes: Brushes and harsh detergents in automatic car washes can scratch the sealant and reduce its effectiveness. Opt for hand washing instead.
Alternative Methods for Quick Fixes
If you’re short on time or prefer a simpler solution, there are alternative methods to restore headlights that require minimal effort. While these methods may not last as long as a full restoration, they can provide a temporary boost in clarity.
- Toothpaste Method: Apply a non-gel toothpaste to the headlight and scrub with a soft cloth in circular motions. Rinse and repeat as needed. This method works best for very light cloudiness.
- Baking Soda Paste: Mix baking soda with water to form a paste and apply it to the headlight. Gently scrub with a microfiber cloth, then rinse and dry.
- Headlight Restoration Wipes: Convenient and easy to use, these pre-moistened wipes contain mild abrasives and polishing agents to quickly restore clarity. Simply wipe the headlight and buff dry.
When to Consider Professional Help
While DIY restoration is effective for most cases, there are situations where professional help may be necessary. If your headlights are severely cracked, deeply pitted, or have extensive damage, a professional may be able to restore them or recommend replacement. Additionally, if you’re uncomfortable with the sanding or polishing process, a professional service can ensure the job is done correctly without risking further damage.
Final Thoughts
Restoring your headlights is a rewarding DIY project that enhances your vehicle’s safety, appearance, and value. By following this step-by-step guide, you can achieve professional-level results without breaking the bank. Whether you opt for a full restoration with sanding and polishing or a quick fix with household items, maintaining clear headlights is essential for every driver. So, roll up your sleeves, gather your supplies, and get ready to revive your ride’s shine!