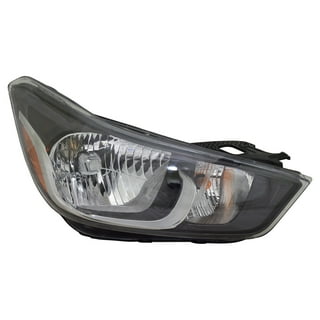
Understanding the Problem: Why Headlights Lose Their Glow
Over time, even the most carefully maintained headlights can become dull and yellowed, reducing visibility and compromising safety on the road. This common issue isn’t just a cosmetic concern—it directly affects your ability to see clearly at night or in poor weather conditions. The primary culprit behind dim headlights is oxidation. When the protective coating on the headlight lens degrades due to exposure to UV rays, dirt, and environmental pollutants, the plastic becomes cloudy and discolored. Other factors, such as scratches from debris or improper cleaning techniques, can further exacerbate the problem, scattering light instead of allowing it to shine through clearly.
Signs Your Headlights Need Attention
- Yellowish or brownish tint: A clear sign of oxidation, where the lens has lost its transparency.
- Visible scratches or cracks: These can distort light output and worsen over time.
- Reduced brightness: Headlights that appear dimmer than they used to, even with a new bulb installed.
- Uneven light distribution: Light scattering in multiple directions instead of focusing forward.
Ignoring these signs doesn’t just impact your driving experience—it can also lead to failed inspections in many regions where clear headlights are a legal requirement. Fortunately, reviving dull headlights is a straightforward process that doesn’t require professional help in most cases.
DIY Solutions: Simple Steps to Restore Clarity
Reviving your headlights can be done at home with a few affordable and accessible tools. The most effective methods focus on removing the oxidized layer and restoring the lens’s clarity. Here’s a step-by-step guide to help you get started.
Step 1: Gather Your Supplies
Before beginning, ensure you have the following items on hand:
- A headlight restoration kit (available at auto parts stores or online).
- Fine-grit sandpaper (typically 800, 1000, and 2000 grit).
- Masking tape or painter’s tape.
- Automotive soap or glass cleaner.
- A microfiber towel or soft cloth.
- UV-resistant clear coat spray (optional but recommended).
- Plenty of water for rinsing.
Some kits include specialized compounds or polishing pads, which can simplify the process. If you prefer a more natural approach, household items like baking soda and toothpaste can also be used, though results may vary.
Step 2: Clean the Headlights Thoroughly
Start by washing the headlights with automotive soap and water to remove dirt and grime. This step is crucial because any debris left on the surface can scratch the lens during sanding. Dry the headlights completely with a microfiber towel before moving on to the next step. If there are stubborn stains or bugs, use a glass cleaner to ensure a clean surface.
Step 3: Sand Away the Oxidation
Begin with the coarsest sandpaper (800 grit) and sand the headlight in a circular motion. Apply even pressure and keep the sandpaper wet to prevent scratching. Rinse the headlight frequently to remove residue and check your progress. Gradually move to finer grits (1000 and then 2000), repeating the sanding process each time. The goal is to smooth out the surface and remove the dull, yellowed layer without over-sanding.
Be cautious around the edges and seals to avoid damaging the headlight housing. Once you’ve finished sanding with the 2000-grit paper, the headlight should appear noticeably clearer and more transparent.
Step 4: Polish and Restore the Shine
After sanding, apply a polishing compound to the headlight using a buffing pad or a soft cloth. Work the compound into the surface in circular motions, applying moderate pressure. This step removes any fine scratches left by the sandpaper and restores the lens’s original clarity. Many kits include a dedicated polish, but you can also use a high-quality car wax or even toothpaste in a pinch. Wipe away any excess residue with a clean cloth.
For an added layer of protection, consider applying a UV-resistant clear coat spray. This will help prevent future oxidation and extend the life of your headlight restoration. Follow the spray’s instructions carefully, ensuring even coverage and adequate drying time.
Alternative Methods: When DIY Isn’t Enough
While DIY restoration works well for most drivers, some cases require professional intervention. If your headlights are severely cracked, pitted, or have deep scratches, a repair shop may recommend replacing the entire lens. Additionally, if you’ve attempted restoration but the headlights remain dull, it could indicate underlying issues such as moisture buildup inside the housing.
Professional Restoration Services
Many auto body shops and detailers offer headlight restoration as a standalone service. Professionals use specialized equipment, such as wet sanders and high-speed polishers, to achieve a more precise and durable finish. While this option is more expensive than a DIY approach, it often provides longer-lasting results, especially for heavily oxidized lenses.
When choosing a service provider, look for businesses with positive reviews and experience in headlight restoration. Ask about their methods and whether they use UV-resistant coatings to protect your investment.
Replacement vs. Restoration
In some cases, replacement may be the most practical solution. Older headlights with significant internal fogging or yellowing may not respond well to polishing. If you’re unsure, consult a mechanic or auto parts store for advice. Modern headlights, especially those made from polycarbonate, are designed to last, but extreme damage often warrants a replacement.
Preventing Future Fading: Maintenance Tips
Restoring your headlights is only half the battle—keeping them clear and bright requires regular maintenance. By adopting a few simple habits, you can significantly extend the life of your headlight restoration and ensure safer nighttime driving.
Regular Cleaning
Make it a habit to clean your headlights whenever you wash your car. Use a dedicated automotive soap and a soft cloth to avoid scratching the lens. Avoid harsh chemicals like bleach or ammonia-based cleaners, as they can accelerate oxidation. For stubborn grime, a mixture of water and vinegar can be effective.
Parking Smart
Where you park your car can impact the longevity of your headlights. Whenever possible, park in shaded areas or use a car cover to minimize exposure to direct sunlight. UV rays are one of the primary causes of oxidation, so reducing their impact can slow down the yellowing process.
Apply a Protective Sealant
After restoring your headlights, consider applying a protective sealant or wax. Products like 303 Aerospace Protectant or dedicated headlight sealants create a barrier that shields the lens from UV rays, dirt, and moisture. Reapply these products every few months or as recommended by the manufacturer.
Check for Moisture
Moisture buildup inside the headlight housing can lead to internal fogging and reduced performance. If you notice condensation or a cloudy appearance inside the lens, it may be time to replace the headlight or have it professionally serviced. Keeping the housing sealed and free of cracks is essential for maintaining clarity.
Maintaining Safety: The Importance of Clear Headlights
Clear, well-functioning headlights aren’t just a convenience—they’re a critical safety feature. According to the National Highway Traffic Safety Administration (NHTSA), poor visibility is a contributing factor in many nighttime accidents. Dull or yellowed headlights reduce the distance you can see ahead, giving you less time to react to obstacles, pedestrians, or other vehicles.
In addition to safety concerns, many regions have strict regulations regarding headlight clarity. During vehicle inspections, inspectors often check for proper light output and lens condition. Failing to address dull headlights could result in a citation or the need for immediate repairs.
By taking the time to restore and maintain your headlights, you’re not just improving your car’s appearance—you’re enhancing your ability to drive safely in low-light conditions. Whether you choose a DIY approach or seek professional help, the effort is well worth the reward of clearer, brighter roads ahead.
Final Thoughts: Drive with Confidence
Reviving dull headlights is a simple yet impactful way to improve both the safety and aesthetics of your vehicle. With the right tools, a little patience, and consistent maintenance, you can restore your headlights to their original clarity and enjoy a brighter, safer drive. Don’t let oxidation dim your visibility—take action today and experience the difference clear headlights can make.
Remember, a well-maintained car isn’t just about performance under the hood; it’s also about ensuring every component, including your headlights, is in top condition. By making headlight restoration a regular part of your car care routine, you’ll drive with confidence and peace of mind, no matter the conditions outside.