Affordable Headlight Restoration: Brighten Your Ride for Less!
Driving with dull, yellowed headlights isn’t just an eyesore—it’s a safety hazard. Over time, headlights become cloudy and oxidized due to UV exposure, road debris, and harsh weather. This reduces visibility, making it harder to spot obstacles or pedestrians at night. Fortunately, restoring your headlights doesn’t have to break the bank. With the right techniques and a little elbow grease, you can bring back that factory shine without spending a fortune on replacements. In this guide, we’ll explore cost-effective ways to restore your headlights, from DIY methods to budget-friendly professional services.
Why Headlight Restoration Matters
Before diving into solutions, it’s important to understand why restoration is worth your time. Faded headlights can reduce light output by up to 50%, according to studies by the Automobile Association of America (AAA). This degradation isn’t just aesthetic—it directly impacts your ability to drive safely after dark. Many drivers mistake dim headlights for a bulb issue, only to find that the lenses themselves are the problem. Restoring them improves light dispersion, enhances visibility, and even increases your car’s resale value. Plus, it’s a sustainable choice, reducing waste from discarded plastic lenses.
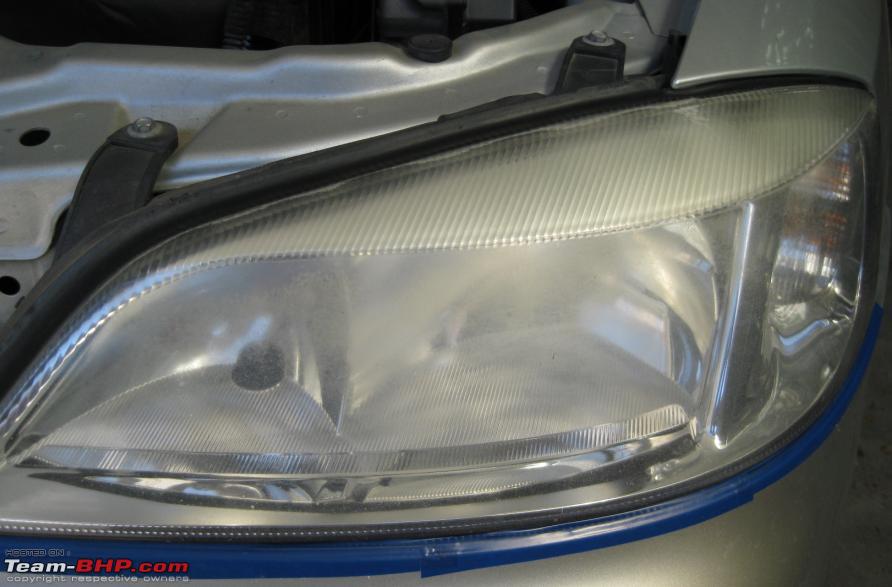
Signs your headlights need attention include a milky appearance, visible scratches, or a noticeable drop in brightness. If your headlights look more like frosted glass than clear plastic, it’s time for action. The good news? You don’t need to replace the entire assembly. Restoration is often as simple as polishing the lens surface to remove oxidation and grime.
DIY Headlight Restoration: Tools and Techniques
Restoring your headlights at home is the most budget-friendly option, with costs ranging from just a few dollars to under $20. The key is using the right materials and following a systematic approach. Below are the most effective DIY methods, ranked by ease and effectiveness.
Method 1: Toothpaste and Baking Soda Scrub
This is the simplest and cheapest method, using common household items. Toothpaste (especially non-gel, whitening formulas) and baking soda act as mild abrasives to remove surface oxidation. Here’s how to do it:
- Step 1: Clean the Headlights
– Wash the headlights with soap and water to remove dirt and grime.
– Dry them thoroughly with a microfiber towel. - Step 2: Apply the Paste
– Mix a small amount of toothpaste (or baking soda) with water to form a thick paste.
– Apply the paste to the headlight lens using a clean cloth or sponge. - Step 3: Scrub Gently
– Rub the paste in circular motions for about 5–10 minutes.
– Focus on the most cloudy areas but avoid pressing too hard to prevent scratching. - Step 4: Rinse and Dry
– Rinse the headlights with clean water.
– Wipe them dry and inspect the results. - Step 5: Protect with Wax
– Apply a thin layer of car wax or UV sealant to protect the newly restored surface.
This method works best for light to moderate cloudiness. For heavily oxidized lenses, you may need to repeat the process or combine it with other techniques.
Method 2: Wet Sanding and Polishing
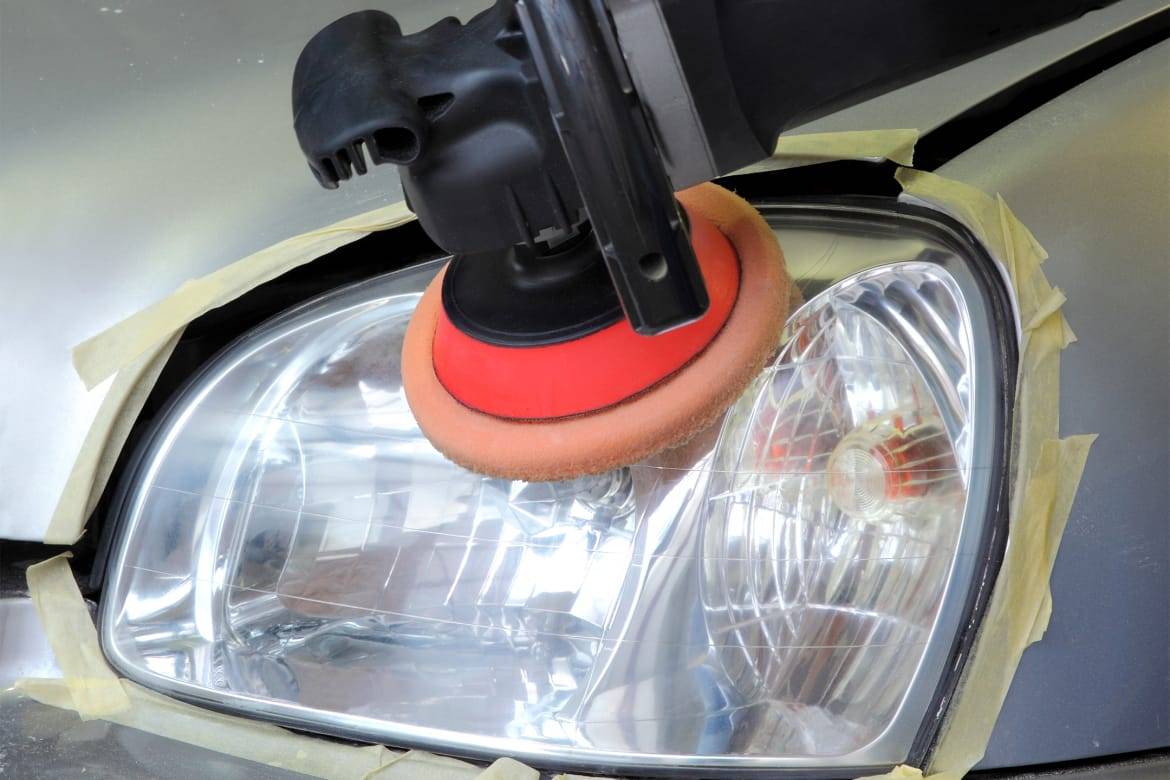
For more stubborn oxidation, wet sanding followed by polishing yields professional-level results. This method involves progressively finer grits of sandpaper to smooth out the lens surface before restoring clarity with a polishing compound. While slightly more labor-intensive, it’s still affordable and highly effective.
Here’s what you’ll need:
- Wet/dry sandpaper (400, 800, 1000, and 2000 grit)
- Water spray bottle or bucket
- Car polishing compound (e.g., Meguiar’s or Turtle Wax)
- Microfiber polishing pads or a dual-action polisher (optional)
- UV-resistant sealant or clear coat spray
Follow these steps:
- Step 1: Wet the Headlight and Sandpaper
– Soak the sandpaper in water for 5–10 minutes to prevent scratching.
– Continuously spray water on the headlight during sanding to keep it lubricated. - Step 2: Start with Coarse Grit
– Use 400-grit sandpaper to remove the top layer of oxidation.
– Sand in straight lines, applying even pressure.
– Wipe away residue and switch to 800-grit, then 1000-grit, and finally 2000-grit, each time sanding in a different direction (e.g., horizontal, then vertical). - Step 3: Polish the Surface
– Apply a small amount of polishing compound to a microfiber pad.
– Polish the headlight in circular motions until the surface becomes clear and reflective. - Step 4: Seal the Lens
– Apply a UV-resistant sealant or clear coat spray to protect the headlight from future oxidation.
– Allow it to cure according to the product instructions.
Wet sanding requires patience and attention to detail, but the results are long-lasting and impressive. It’s ideal for restoring headlights that haven’t been treated in years.
Budget-Friendly Alternatives to DIY
If DIY isn’t your style, or if your headlights are extremely damaged, there are still affordable options beyond full replacement:
Headlight Restoration Kits
Pre-packaged headlight restoration kits are widely available online and in auto stores, typically costing between $10 and $30. These kits often include sandpaper, polishing compounds, and sealants—everything you need in one box. Popular brands like 3M, Sylvania, and Chemical Guys offer reliable options. While results vary, many kits deliver professional-level clarity when used correctly.
When choosing a kit, look for one that includes UV protection to extend the life of your restoration. Avoid ultra-cheap kits with low-quality sandpaper, as they may leave fine scratches.
Mobile Headlight Restoration Services
Some mobile detailing services specialize in headlight restoration and can come to your home or office for a fraction of the cost of a full detail. Prices typically range from $50 to $100, depending on your location and vehicle size. These services use professional-grade tools and sealants, often with better durability than DIY methods.
Search for local mobile detailers with strong reviews, and ask if they use UV-protective sealants. This option is ideal for those who want high-quality results without the hassle of doing it themselves.
Maintaining Restored Headlights
Restoration isn’t a one-time fix—proper maintenance keeps your headlights clear and bright for months or even years. Here’s how to extend the life of your restoration:
- Regular Cleaning
– Wash your headlights with soap and water regularly to remove dirt and road grime.
– Avoid harsh chemicals like ammonia-based glass cleaners, which can degrade the lens material. - Apply UV Protection
– Reapply a UV-resistant sealant or wax every 3–6 months, especially in sunny climates.
– Spray-on sealants are quick and easy to apply. - Avoid Automatic Car Washes
– High-pressure car washes can strip away protective coatings.
– Hand-wash your vehicle or use touchless car washes. - Park in the Shade
– Prolonged sun exposure accelerates oxidation.
– If possible, park in a garage or use a car cover.
By following these tips, you’ll minimize the need for frequent restorations and keep your headlights looking—and functioning—like new.
When to Consider Replacement
While restoration is ideal for most cars, there are cases where replacement is the better choice:
- Cracks or Deep Pitting
– If the headlight housing is cracked or pitted beyond repair, restoration won’t fix structural damage.
– Moisture can get trapped inside, leading to fogging or electrical issues. - Discolored or Warped Lenses
– Some headlights turn brown or yellow due to internal UV damage, which can’t be polished out.
– Warped lenses distort light output, making them unsafe to use. - Bulb Compatibility Issues
– Modern LED or HID headlights may not benefit as much from restoration, as their brightness depends on the bulb type.
– If your headlights are foggy despite restoration, consider upgrading to high-quality bulbs.
If replacement is necessary, opt for OEM (Original Equipment Manufacturer) parts when possible. While they’re more expensive than aftermarket options, they ensure proper fit and light distribution. Used headlights from junkyards are another budget-friendly alternative, but inspect them closely for cracks or fogging.
Final Thoughts: Drive Safely and Save Money
Headlight restoration is a small investment that pays off in safety, aesthetics, and long-term savings. Whether you choose a simple toothpaste scrub or a full wet-sanding treatment, the process is straightforward and rewarding. By maintaining your restored headlights and protecting them from UV damage, you can enjoy clearer visibility and a like-new appearance for years.
Don’t let foggy headlights dim your driving experience. With these affordable methods, you can restore your ride’s shine without emptying your wallet. Take action today—your nighttime driving safety (and your car’s value) will thank you!